Managing Schedule/Events
- Updated Cristal Mojica
Your schedule allows attendees to understand what is going to be included in your program - and helps them plan for and get excited about your conference content! The following resource summarizes how you can easily manage the events in your program’s schedule with Midspace.
We share a brief overview of the relationship between events and content, then walk through Midspace’s UI to show you exactly how to create and schedule an event. Common scenarios are identified and advice for how to tackle them is provided!
You can follow these simple instructions to create an event in your schedule:
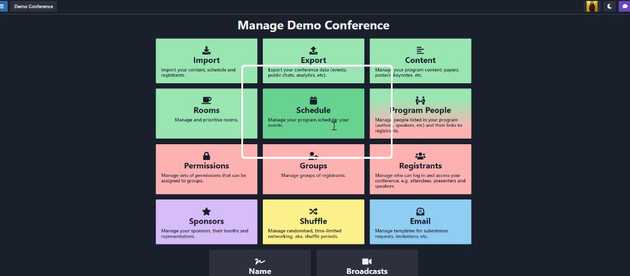
- Navigate to the Schedule area of the Midspace admin dashboard.
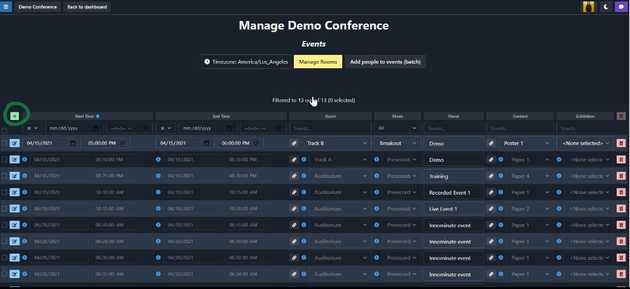
- We can see a few events are already listed in the program. From this page, you can add a new event to your program using the green plus (+) sign on the left.
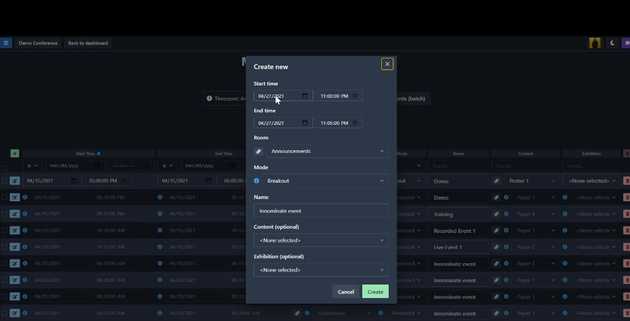
- The Create New dialog will have appeared after clicking the green plus sign. Add the event start date and time, end date and time, event name, and associated room that it will be hosted in.
- From here, you can also link any content that will be presented during the event and will show up as part of the event on the schedule. Select your preferred Mode (format) for the event from the dropdown list - this includes workshop, Q&A, presentation, pre-recorded video, and many others. Lastly, you have the option to select for the event to be associated with an Exhibition, if this grouped content format is part of your program.
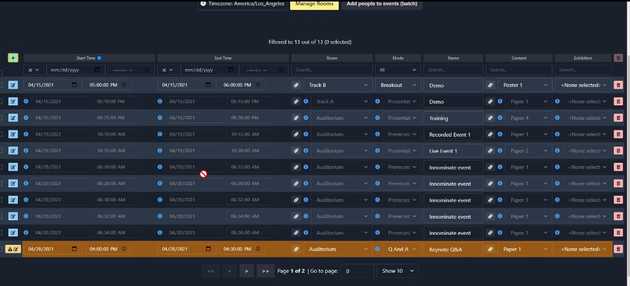
- After you click Create, you’ll see your new event appear as a new row in the Schedule’s list of events!
- You’ll notice this new event is highlighted with an alert icon on the left. This is a notification that appears on events that require a live presenter at the event. This is determined by the Mode you have selected. In this case, we created a Q&A event, so the alert is telling us we need to assign presenters for this session.
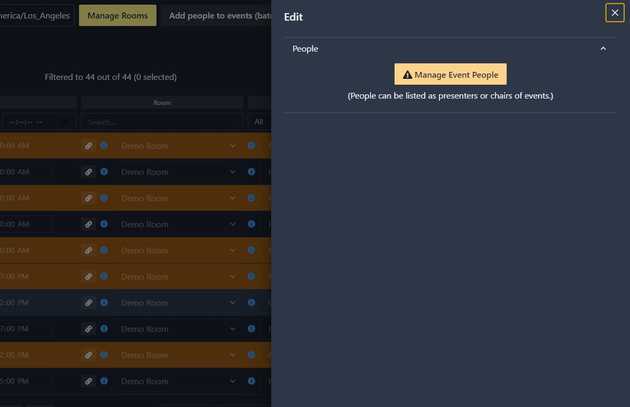
- By clicking on the triangle alert icon on the left, a new sidebar will appear with the option to Manage Event People associated with the event.
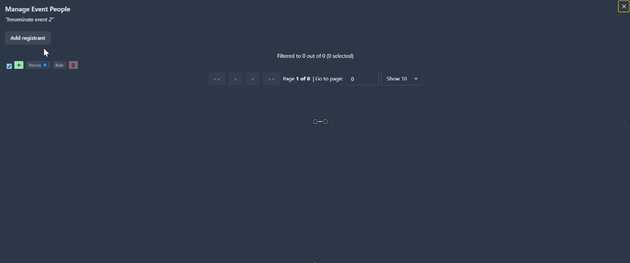
- After clicking through Manage Event People, you can add a person to the event by either:
A. Clicking the green plus sign on the left, and selecting the appropriate person from the available list of people in your program (authors, chairs, etc) OR
B. Clicking the Add Registrant and selecting from the full list of your conference’s registrants (individuals registered to attend your conference).
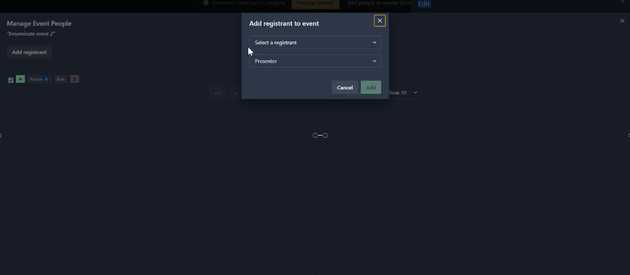
- For this example, we have selected Add Registrant. Simply select the registrant from the dropdown list, and select the role this individual should have in relation to this specific event.
- Once you’ve clicked Add, the individual will now appear in the list of people associated with your event! This will remove the alert from your event - and you are now free to manage other components of your program.
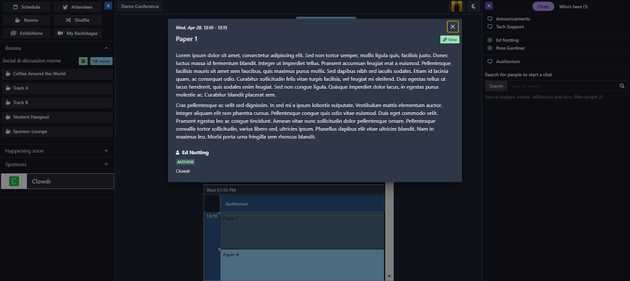
- You can view your program’s schedule and the event you’ve just created in the attendee view, via the Schedule button at the top of the left-hand menu.
Clicking on the event opens up additional details from the content that has been linked to the event during set up.
